Keep PowerPoint On-Brand with Copilot

A step-by-step guide to building a PowerPoint template that Copilot can actually use — from sample slides and Slide Master setup to themes, placeholders, and uploading to your Brand Kit.

🎯
Module 1 · Foundation

Why Your Template Is Copilot’s Foundation

~5 min

When you ask Copilot in PowerPoint to create or edit slides, it doesn’t just apply a theme — it learns from your template, infers your brand’s visual language, and generates on-brand output. A well-structured template means presentations that look like your organization made them.

Concept 1.1 The Three Inputs Copilot Uses

Every Copilot-generated PowerPoint is synthesized from three sources:

🧾

Slides & Layouts

The sample slide types and layouts defined in your brand template.

🧨

Objects

Design elements — text, shapes, images, data visualizations — inside those sample slides.

💬

Your Prompt

The specific instructions you give Copilot for the topic, tone, and content of the deck.

💡 Key Insight
Copilot primarily uses your sample slides, and secondarily your template’s structure and layouts from the Slide Master. The more representative slides you provide, the better the output.
Concept 1.2 How Copilot Builds a Slide (Step by Step)
  1. 1 Copilot interprets your request and identifies the slide types you need.
  2. 2 It looks at the sample slides in your template and selects the closest matching layouts.
  3. 3 It generates content that fits the placeholder structure, density, and visual hierarchy of those layouts.
  4. 4 It applies brand assets — images, icons, fonts, even brand voice — from your Brand Kit.
⚠️ If your template lacks sample slides
Copilot falls back to the Slide Master alone, which usually produces generic layouts, minimal formatting, and slides that don’t match your brand.
🧾
Module 2 · The Most Important Step

Provide Representative Sample Slides

~15 min

Sample slides are the single biggest lever for on-brand output. Build a set of fully-designed example slides that show Copilot exactly how your brand communicates — layouts, density, color, typography, imagery, and data viz.

Exercise 2.1 Build Your Core Layout Library

Open your .pptx or .potx file and add at least one fully-designed sample slide for each of the layouts below. Multiple examples per type (e.g. two different content layouts) give Copilot more choice.

  1. 1 Decide which generic layouts your team uses most often.
  2. 2 Design one polished example of each, using real-looking content (placeholder Lorem text is fine).
  3. 3 Group similar layouts (e.g. multiple section dividers in brand colors) to show Copilot variation.

Recommended core layouts:

Title Agenda Section Header / Divider Content (text, bullets, icons) Image Layouts Data Visualization (tables, charts) Statistics / Dashboards Timelines Process Diagrams / Flow Charts Quotes / Testimonials Q&A Summary / Key Takeaways Conclusion Thank You / Next Steps

Optional, scenario-specific layouts:

Introductions / Bios Meet the Team Contacts Maps Calendar Case Studies
📝 Note
These are recommendations — not requirements. Cover the slide types your brand actually uses; broader layout/style coverage produces better Copilot results.
Exercise 2.2 Demonstrate Content Density

Copilot decides how much text to put on a slide based on the density patterns it sees in your samples. Show all three so it has options.

Light Density

Title & subtitle only

Generous whitespace, big idea per slide. Good for openers and section dividers.

Medium Density

Balanced layouts

Text on one side, image or chart on the other. The workhorse content slide.

Heavy Density

Content-rich, minimal whitespace

Dense text, multicolumn layouts, detailed charts or tables. Reference slides, deep dives.

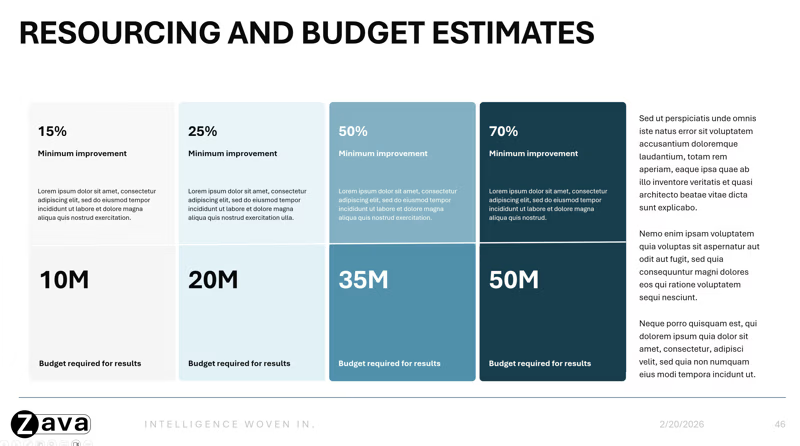
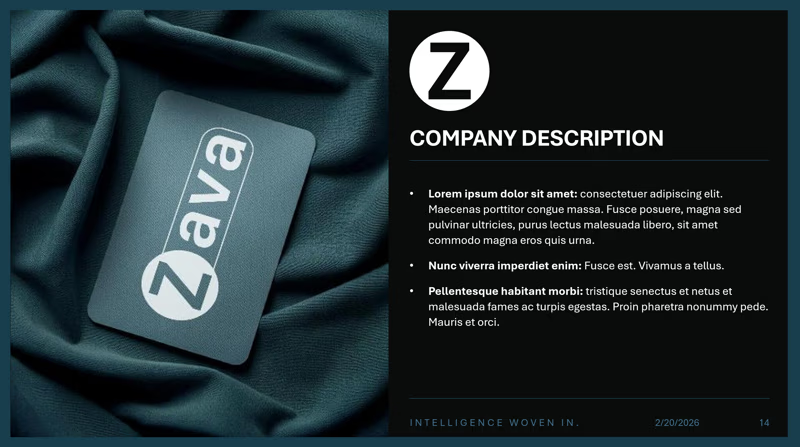
Microsoft example of a medium-density PowerPoint slide
Microsoft’s reference example of a medium-density slide. Source →
Exercise 2.3 Show Visual Style Consistency

Make the visual rules of your brand obvious. The more cleanly your sample slides demonstrate consistent usage, the better Copilot can copy it.

  1. 1 Color usage: show how colors are applied across slide types and within charts, diagrams, and graphs.
  2. 2 Typography hierarchy: include examples of headings, subheadings, and body text actually in use.
  3. 3 Icons and images: show them incorporated into layouts — via placeholders or placed directly.
  4. 4 Multicolor variants: e.g. section header slides in multiple brand-approved colors so Copilot can rotate them.
Sample slide showing visual style with brand colors and typography
Visual-style sample — consistent color, type, and layout cues.
Exercise 2.4 Photography & Image Styles

Include real example slides that show how your brand uses imagery — composition, cropping, and placement.

  1. 1 Add a full-bleed background image example (e.g. for title slides).
  2. 2 Add an inset image + caption example (e.g. for content slides).
  3. 3 Show multiple aspect ratios if your brand uses them (square, 16:9, portrait).
  4. 4 Where possible, use picture placeholders so Copilot can swap in new images.
Sample slide showing brand photography style
Photography style sample — full-bleed composition.
Exercise 2.5 Data Visualization Patterns

Build out sample slides that show how your brand presents data — Copilot will reuse the patterns.

  1. 1 Add a highlighted statistic / KPI slide layout.
  2. 2 Add chart examples using brand colors (bar, line, pie if used).
  3. 3 Add a table example with brand styling.
  4. 4 Add process / timeline / infographic samples in your visual language.
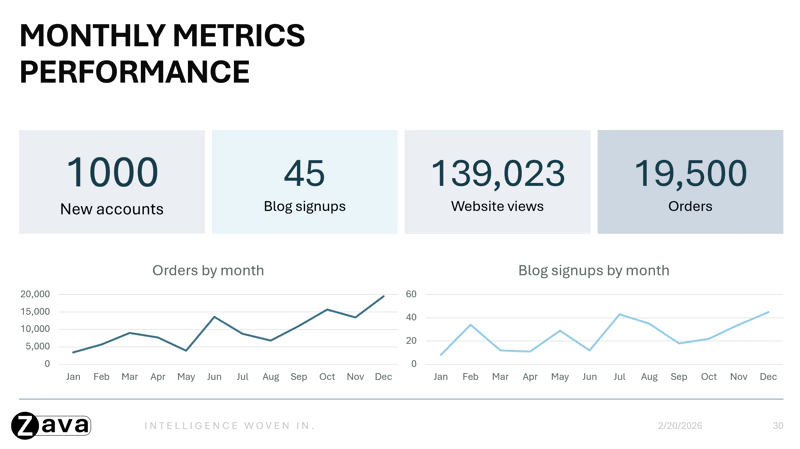
Sample slide showing brand data visualization with metrics
KPI / metric layout example.
⚡ Best Practices Tips for the Best Sample Slides
✅ Do
  • Design each slide with a clear, recognizable purpose.
  • Build complete, end-to-end layouts — not loose icon/chart libraries.
  • Choose layouts that reflect how you actually work day-to-day.
  • Use images and icons to improve readability and visual flow.
  • Ensure object negative spaces don’t overlap — especially text boxes.
❌ Avoid
  • Don’t mix instructional / guidance content into the template — keep it separate.
  • Don’t include “component libraries” with loose icons; Copilot can’t infer intent from them.
  • Don’t let decorative elements overlap text or image areas.
  • Don’t use one-off manual formatting that contradicts your theme.
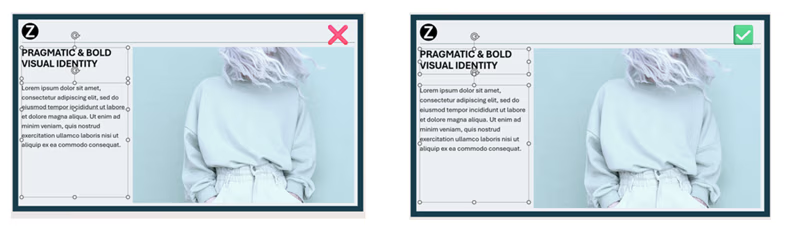
Example showing object negative spaces that don't overlap
No-overlap rule — clean negative space helps Copilot read and regenerate the layout cleanly.
📝
Module 3 · Backbone

Set Up Your Template in Slide Master

~10 min

Slide Master is the structural backbone Copilot falls back to when sample slides don’t fully cover a request. A clean Slide Master keeps generated slides on-brand even in edge cases.

Exercise 3.1 Open Slide Master View
  1. 1 Open your template (.pptx or .potx) in PowerPoint for Windows or Mac — not the web app.
  2. 2 Go to the View tab → Slide Master (in the “Master Views” group).
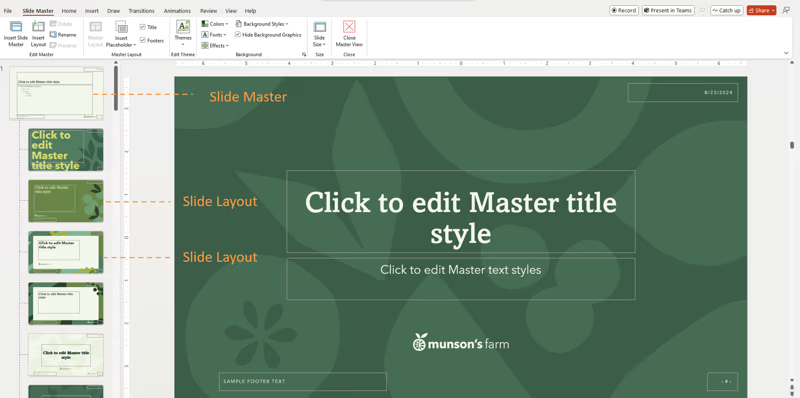
  3. 3 The top thumbnail is the Slide Master; the indented ones below are Slide Layouts that inherit from it.
⚠️ Important
Templates must be created in PowerPoint Desktop (Windows or Mac). You can use a template on any platform, but building Slide Masters on the web is not supported.
Concept 3.2 Understand the Hierarchy

Anything you define on the Slide Master is inherited by every Slide Layout below it. Define brand basics once at the top, then specialize per layout.

Slide Master  (brand basics)
Title Layout
Content Layout
Section Divider
Data Layout
Q & A
PowerPoint Slide Master View showing master and child layouts
The Slide Master (top) and its child Slide Layouts in Slide Master view.
💡 Tip
Customize the Slide Master to ensure consistent branding across all AI generated slides — Copilot leans on the Slide Master whenever your sample slides don’t fully cover a request.
🎨
Module 4 · Brand DNA

Use Theme Settings, Not Manual Styling

~10 min

Copilot learns from theme definitions, not one-off formatting. Define your brand DNA centrally and Copilot will apply it everywhere.

Exercise 4.1 Define Theme Colors
  1. 1 In Slide Master view, go to the Slide Master tab → ColorsCustomize Colors… (or Create New Theme Colors).
  2. 2 Set the 12 theme slots to your brand palette — backgrounds, text, accents, and hyperlinks.
  3. 3 Save the theme with a descriptive name (e.g. “Acme 2026 Primary”).
📝 Why this matters
When Copilot inserts a new chart, accent shape, or callout it uses theme slots. Hard-coded hex colors won’t carry through.
Exercise 4.2 Set Theme Fonts
  1. 1 Slide Master tab → FontsCustomize Fonts…
  2. 2 Choose your Heading and Body fonts (use brand-approved typefaces).
  3. 3 Apply consistent font sizes and hierarchy throughout your sample slides (H1 vs H2 vs body).
Exercise 4.3 Standardize Visual Styles

Apply consistent styling across all layouts so Copilot has one clear visual language to copy.

  • Chart color schemes — align with your theme accents.
  • Icon style — outline vs filled, stroke weight, color rules.
  • Shape style — corner radius, border thickness, fill style.
  • Image placeholder style — aspect ratios, crops, overlays.
💡 Tip
Pick a single icon family for the whole template. Mixing flat, outlined, and skeuomorphic icons signals to Copilot that “anything goes” — and the output gets messy.
📎
Module 5 · Structure

Use Placeholders Correctly

~8 min

Placeholders tell Copilot what kind of content goes where. Copilot uses placeholder type, position, and size — not the example text inside them — to generate slides.

Concept 5.1 Placeholder Types
Title Body text Image / Picture Chart Table

Each type carries semantic meaning Copilot relies on when generating content. A title placeholder gets a title; a chart placeholder gets a chart.

Exercise 5.2 Insert Placeholders the Right Way
  1. 1 In Slide Master view, select a Slide Layout (not the Master itself).
  2. 2 Click Slide Master → Insert Placeholder and pick the correct type (Content, Picture, Chart, Text, Table…).
  3. 3 Position and size the placeholder cleanly — no overlap with other objects.
  4. 4 Repeat for every layout that needs content injection.
✅ Do
  • Use text placeholders — not free-floating text boxes.
  • Insert via Insert Placeholder in Slide Master view.
  • Keep placeholders readable and non-overlapping with other objects.
  • Use picture placeholders for image swaps.
❌ Avoid
  • Don’t use plain text boxes for content Copilot should fill.
  • Don’t put decorative shapes on top of text or image areas.
  • Don’t rely on placeholder wording to convey meaning — Copilot uses placeholder type, not the text inside it.
  • Don’t overlap placeholders with logos, backgrounds, or watermarks.
☁️
Module 6 · Go Live

Upload Your Template to Brand Kit

~5 min

Once your template is optimized, upload it to your Brand Kit or Organization Assets Library (OAL) so Copilot in PowerPoint can use it for every new presentation.

Exercise 6.1 Add Your Template to a Brand Kit
  1. 1 Open the Microsoft 365 Copilot app.
  2. 2 In the left navigation, choose Create More…Brand kits.
  3. 3 Open your Brand kit → go to Templates.
  4. 4 Click Upload Template or pick an existing template from your Organization Asset Library.
  5. 5 Select your .potx or .pptx file.
  6. 6 Add metatags (optional but helpful for discovery).
  7. 7 Click Add to Brand kit — you’re done.
💡 Pro Tip
Pair your template with the Brand Kit’s voice/tone/imagery settings for the strongest on-brand results. Copilot combines all of it.
⚡ Power Move Iterate Based on Real Output

Don’t treat the template as “done” on upload. Generate a real deck, see where Copilot stumbles, and add or refine sample slides to fill those gaps.

Test Prompt — Run This in PowerPoint
Create a 10-slide presentation for [topic] using our brand template. Include a title slide, agenda, three content slides with supporting visuals, a data slide with a chart, a quote slide, a summary, and a thank-you slide.
  1. 1 Note any slides where layout, density, or style drifts off-brand.
  2. 2 Add a matching sample slide to your template for that gap.
  3. 3 Re-upload (or update) the template in your Brand Kit and rerun the prompt.
Module 7 · Reference

Frequently Asked Questions

~3 min
Do we need sample slides for every layout?

No — but the more layouts you cover, the better Copilot performs. Prioritize the layouts you actually use day-to-day. Copilot falls back to the Slide Master when a layout isn’t represented, which produces weaker, more generic results.

Will images be placed into picture placeholders reliably?

Picture placeholders are the most reliable way to get Copilot to drop the right image into the right spot. Always prefer picture placeholders over free-floating image objects when you want Copilot to swap in artwork.

Can placeholder text be used as semantic guidance?

No. Copilot uses the placeholder’s type, position, and size — not the example wording inside it. Lorem-ipsum-style placeholder text is fine; instructional text inside a placeholder won’t change Copilot’s behavior.

What happens if generated text needs more space?

Copilot tries to stay within the placeholder’s defined bounds. If your layout has very tight text boxes, generated content can get truncated or feel cramped — design your samples with realistic content density.

Are instructional slides allowed in the template?

Don’t embed instructional / “how to use this template” slides inside the template itself. Copilot will treat them as sample layouts and may try to mimic them. Keep guidance in a separate companion document.

What template formats are supported in Brand Kit?

Both .potx (template) and .pptx (presentation) formats are supported. Either can be uploaded as a Brand Kit template.

Will Copilot follow the template if I open it first?

The most reliable approach is to make the template part of a Brand Kit so Copilot uses it automatically. Manually opening a template and then prompting Copilot can work, but Brand Kit integration gives consistent results across the whole organization.

🔗 Source
Adapted from Microsoft’s official guidance: Keep your presentation on-brand with Copilot →